
In the event you’re trying to be taught find out how to add a vignette in Photoshop and Lightroom very quickly, you then’ve come to the precise place.
On this article, I’m going to cowl every little thing it’s essential learn about vignette–in order that by the point you’ve completed, you’ll know:
- What vignette is
- Distinction between Optical and Inventive vignette
- How one can add a vignette in Photoshop
- How one can add a vignette in Lightroom

What’s Vignetting?
In optics and images, vignetting is the distinction in brightness between the middle and the sides of the picture.
In plain English, vignetting signifies that the additional we transfer from the middle of the picture, the darker it turns into.
There are two varieties of vignetting.
One is unintentional and is generated by images gear. We don’t have a lot management over one of these vignetting because it happens after we take the photograph.
One other kind of vignetting is the one we intentionally create in post-processing. This serves as a artistic device in producing pictures.
Unintentional Optical Vignetting
Lens design is the first reason for optical vignetting. It’s current in each lens mannequin however at totally different levels. In some lenses, vignetting might be very distinguished and, in others, it may be hardly noticeable.
The similar lens produces totally different ranges of vignetting relying on the consumer settings. For instance, optical vignetting is extra distinguished when capturing at wider apertures.
During the last 10 years or so, optical vignetting in images has change into much less of a difficulty.
First, lens design is continually bettering, and, in consequence, vignetting turns into much less distinguished.
Second, it’s a lot simpler to digitally right the vignetting impact in post-processing. Since all lens producers know precisely how their lenses behave in regard to vignetting, they supply lens profiles for each lens mannequin. The removing of undesirable vignetting then turns into a one-click course of in Lightroom and Photoshop.


Some producers like Fujifilm take it even additional by embedding the lens profile into each RAW picture on the time of the capturing. The correction is then mechanically utilized whenever you import images into Lightroom.

Vignetting as a Inventive Device
Over time, photographers have realized find out how to purposefully use vignetting and have made it a necessary device in attaining attention-grabbing and significant compositions.
Whenever you determine the point of interest of the composition, you would possibly use totally different strategies to emphasise it. For instance, you would possibly use the rule of thirds to strategically place your focal point to make it extra seen. You may additionally use the main traces method to steer the viewer’s consideration to at least one particular object.
Vignetting helps us to direct the viewer’s consideration through the use of totally different ranges of brightness. By making the sides of the picture darker, we instantly draw extra consideration to the middle of the composition and deemphasize the periphery.
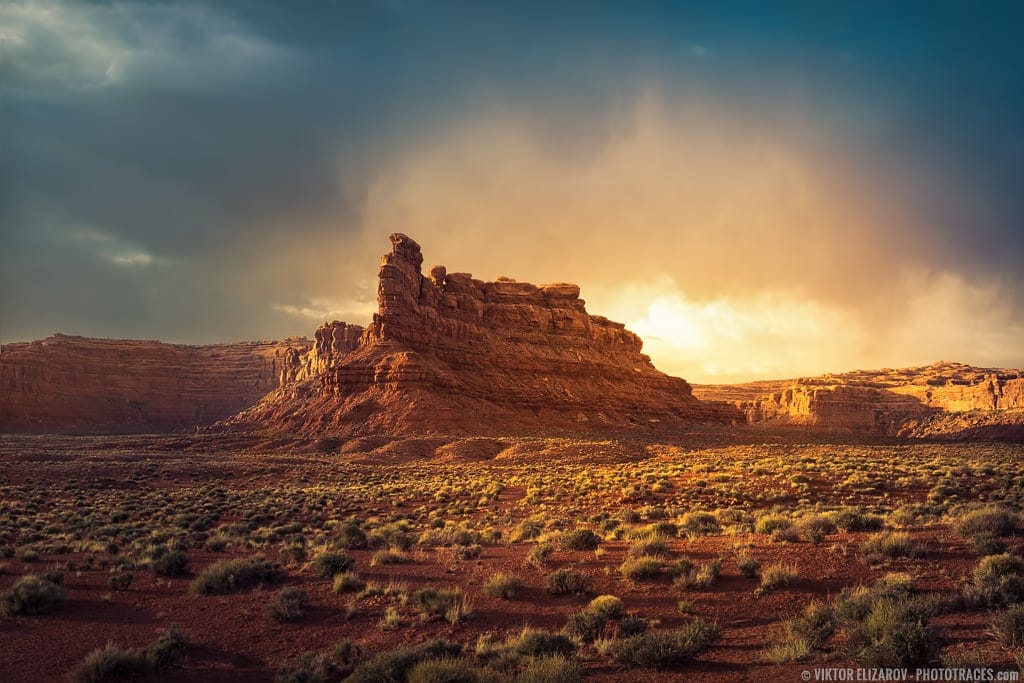
I used fairly a robust vignette to attract consideration to the point of interest of the composition.
Every photographer approaches vignetting in a different way. Some photographers don’t use it in any respect and others use it aggressively. The best way we use vignetting turns into a part of our private model in images.
Associated: Nonetheless Searching for Lightroom Various? I can Assist
In my case, I take advantage of vignetting in 90% of my images. However, I tackle vignetting in a different way in my landscapes and in my portraits. In landscapes, I take advantage of gentle vignetting that’s unnoticeable to the untrained eye and works totally on the unconscious stage. In portraits, I take advantage of vignetting rather more aggressively to attract as a lot consideration as doable to the principle topic.
See additionally: How one can Easy Pores and skin in Lightroom
Right here is an instance of how vignetting impacts the composition and the viewer’s notion.
I took the featured photograph within the Canadian province of New Brunswick throughout my journey to Grand Manan Island.
The point of interest of the composition is the lighthouse on high of the cliff.
Right here is how the photograph seems with none vignetting:
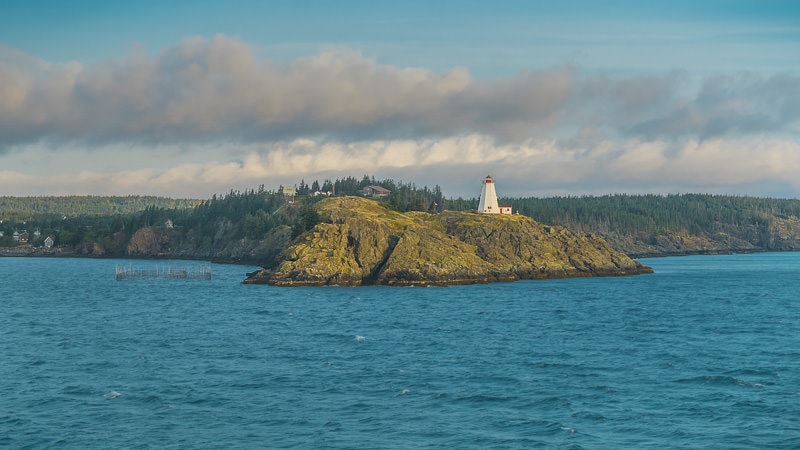
The second model is the ultimate iteration of the photograph, the one I added to my portfolio. Right here, I utilized a really gentle vignette. Though it’s not very noticeable, it’s current. Whenever you evaluate it with the unique model, it turns into obvious.

The final model demonstrates how a photograph seems with very sturdy vignetting utilized.

Now, I need to present you the sensible functions of vignetting and the way I take advantage of it in my images.
3 Methods to Add Vignetting to a {Photograph}
Lightroom Speedy Modifying Toolkit
For individuals who adopted the Lightroom Speedy Modifying workflow, the method of including vignetting to any {photograph} is a single-step course of.
Associated: Obtain my Free Journey Presets for Lightroom
Since vignetting is one thing I take advantage of with each {photograph} I edit, I added 4 vignetting changes to the TOOLKIT.
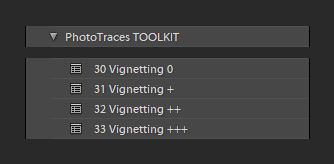
The changes steadily enhance and go from Vignetting 0 to Vignetting +++.
How one can Add a Vignette in Lightroom Manually
In my enhancing workflow, the TOOLKIT changes are all I want 80% to 90% of the time. Within the occasion I want extra management and precision, I leap to the Impact Panel of the Lightroom Develop Module.
You could have loads of choices to manage the vignetting impact within the Impact Panel and might tailor it to your particular wants.

In my images, I take advantage of the Quantity and Midpoint sliders probably the most typically.
First, I set the specified vignetting power utilizing the Quantity slider. Subsequent, I take advantage of the Midpoint slider to regulate how tight it’s to the principal object of the composition.
How one can Add a Vignette in Photoshop
I at all times attempt to do as a lot as my enhancing as doable in Lightroom’s nondestructive RAW atmosphere. However, within the occasion I want extra energy and precision, I leap from Lightroom to Photoshop to complete the enhancing course of.
For instance, the Spot Removing device in Lightroom is a bit restricted for masking and eradicating advanced objects. After I must take away electrical wires and energy poles or undesirable individuals, I want the ability of the Stamp Device in Photoshop.
Associated: How one can Apply Saturation and Vibrance in Lightroom
In these instances, I add vignetting in Photoshop. Don’t be scared—it’s a easy course of with none complexities.
Let’s see find out how to add a vignette in Photoshop

Step 1
Choose the Elliptical Marquee Device (M) from the Toolbar.

Step 2
Drag the mouse from the highest left nook to the underside proper nook to create an elliptical choice.

Step 3
Create the Ranges Adjustment Layer by clicking the adjustment icon on the backside of the Layer Pallet and choose the Ranges possibility.

Step 4
Within the Ranges Properties panel, drag the center slider to the precise till you attain a worth of 0.70.


Step 5
Click on the Masks icon to change from Ranges Properties to Masks Properties.

Step 6
Click on the Invert possibility to invert the masks.


Step 7
Set the Feather worth to 333px. The Feather worth will fluctuate relying on the dimension of your picture. A Feather worth of 333px works finest for 24Mpix photographs.


Step 8
Lastly, use the Opacity slider within the Layer Palette to regulate the power of the vignette to the specified end result.


You might be completed!
Wrapping it up
Vignetting is a quite simple method in images and, normally, is unnoticeable to most of the people. However, it performs an essential position in producing pictures with a stronger impression and emphasis. Be taught to make a behavior to play with the vignetting settings on the finish of the enhancing course of so as to add a remaining contact to your pictures.