 • PhotoTraces")
Perspective in images could seem to be a technical matter, however don’t be fooled; you need to use perspective to boost just about any composition.
You see, perspective is what permits you to convey depth in your pictures–so by way of cautious use of perspective, you possibly can create compelling pictures that draw the viewer straight into the scene (and by no means allow them to depart!).
And on this article, I’m going to share with you every little thing you should learn about perspective, together with the several types of perspective, how you need to use perspective to enhance your pictures, plus lots of useful suggestions for perspective images.
Are you able to turn into a perspective knowledgeable?
Let’s get began!
Definition of Perspective in Pictures
What’s perspective in images? Perspective in images refers to strategies used to create a way of depth in a scene. It depends on the place of the photographer relative to the scene and the place of the compositional components relative to 1 one other. In the end, by adjusting the angle, you possibly can create a scene stuffed with depth–or you possibly can create a very flat scene.
Kinds of Views in Pictures
In images (and in two-dimensional artwork extra usually), a number of completely different views and perspective methods are used to convey a scene’s depth.
Let’s check out every one in flip:
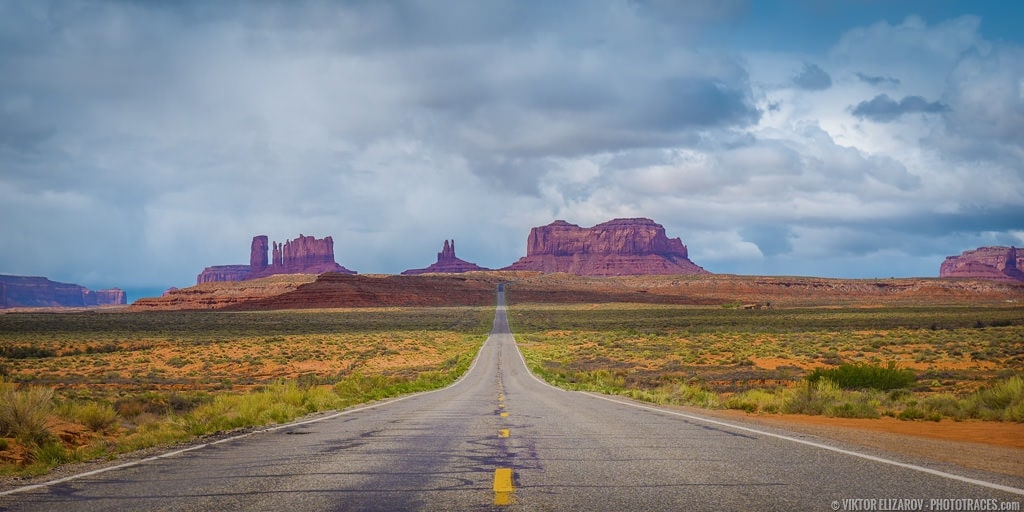
1. One Level Linear Perspective Pictures
A one level linear perspective depends on a gaggle of traces, and a single vanishing level at which all of them converge, like this:
Due to this fact, to create one level linear perspective images, you want a minimum of two traces and some extent at which they arrive collectively.
It is a widespread approach in panorama images, the place main traces usually converge on the horizon.
2. Two Level Linear Perspective Pictures
Two level linear perspective is a barely extra complicated approach, which creates depth by way of two units of traces, converging on two completely different factors.
The 2 vanishing factors are usually positioned alongside the horizon, and the only instance of two level linear perspective images entails a photographer taking pictures on a road nook, so the streets fade again on the correct and left aspect of the scene.
The truth is, it’s uncommon to seek out two level linear perspective utilized in panorama images. However you’ll usually discover it in architectural images, metropolis images, and even road and portrait images, the place streets converge at two vanishing factors behind the primary topic.
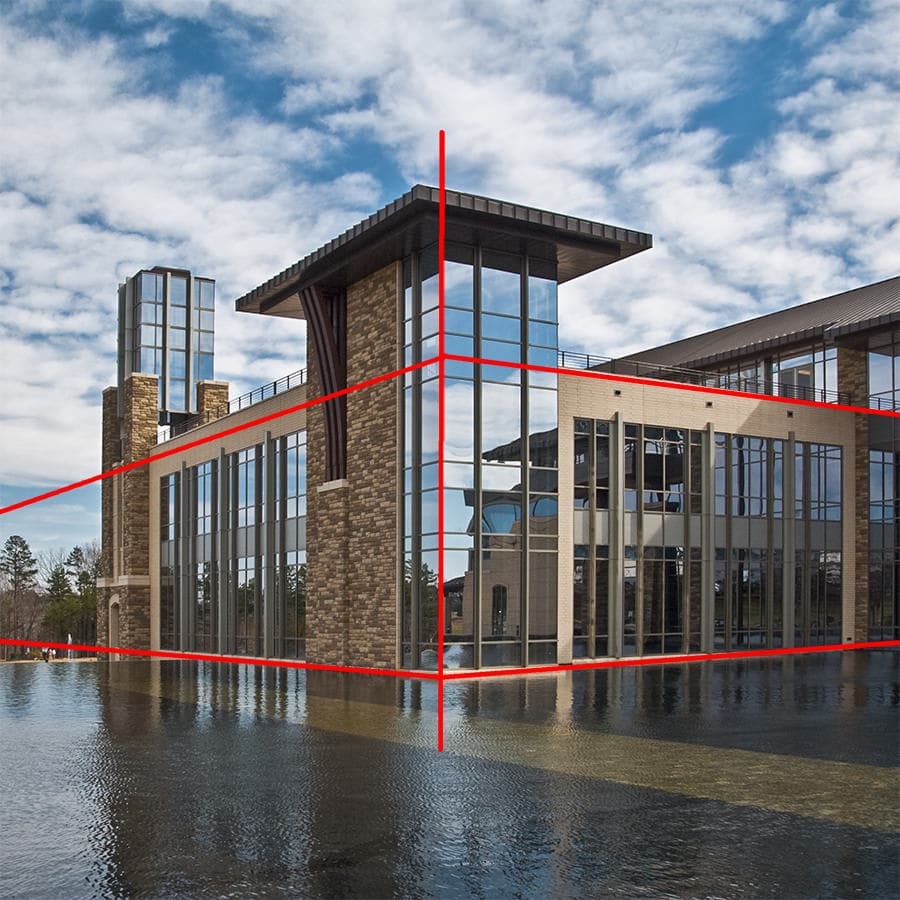
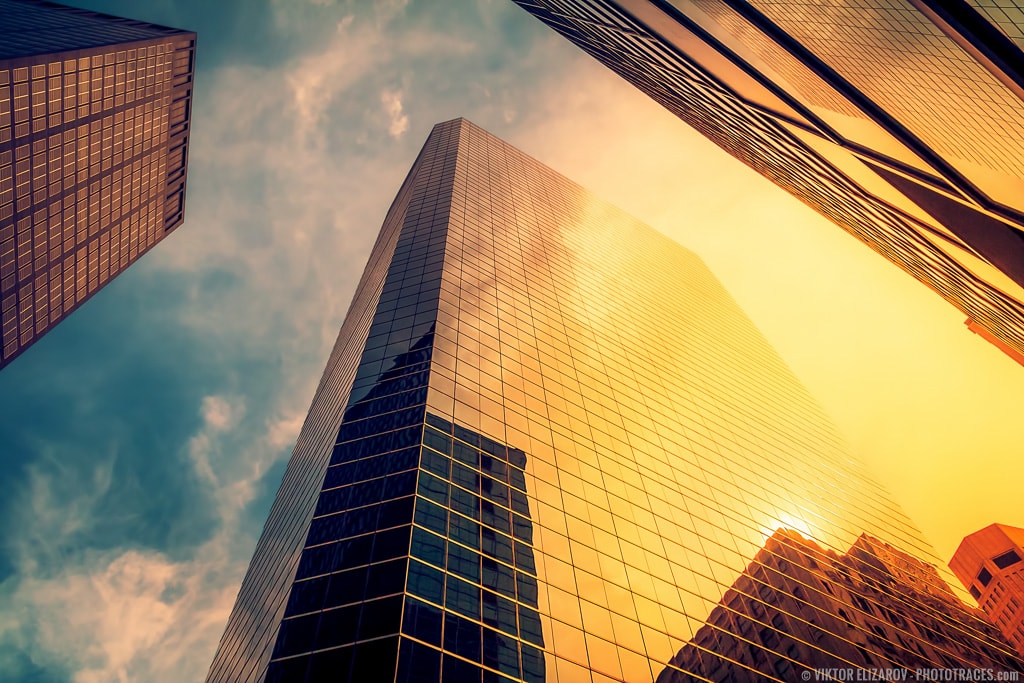
3. Three Level Linear Perspective
Three level linear perspective might be probably the most complicated perspective you’ll use in images (technically, you possibly can enhance the variety of vanishing factors additional, nevertheless it’s very complicated and never usually finished!).
Right here, you might have three vanishing factors, which is what you’ll see in case you stare up the nook of a constructing from shut distance.
You’ll sometimes see this in architectural pictures, nevertheless it’s fairly robust to seek out examples of three level linear perspective in, say, panorama images.
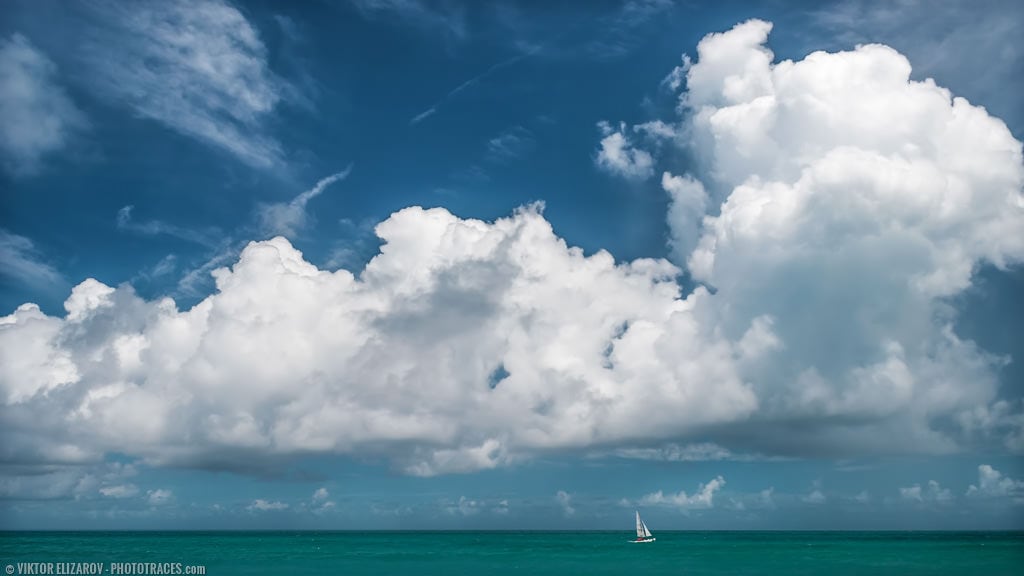
4. Aerial or Atmospheric Perspective Pictures
Aerial perspective, also called atmospheric perspective, focuses on a basic remark:
Distant objects look blurry, whereas shut objects look sharp.
Now, while you take a photograph and take a look at it later, it’s possible you’ll discover a small quantity of atmospheric perspective, particularly if the photograph was taken on a foggy day.
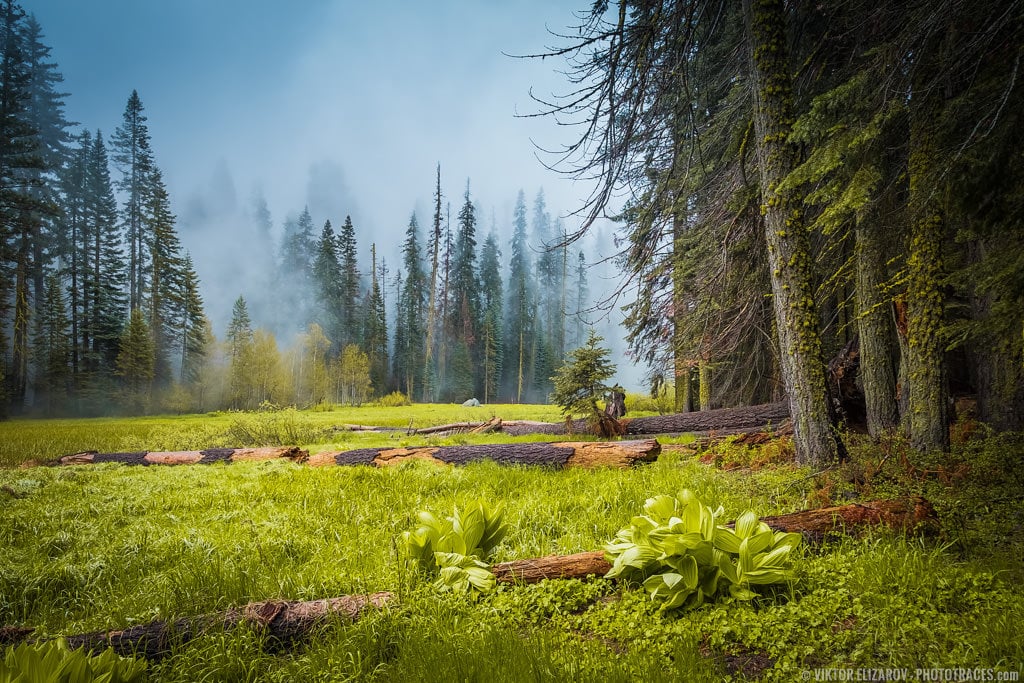
Nonetheless, if you wish to actually improve depth in your pictures, you possibly can add atmospheric perspective in post-processing (by merely lowering the readability of distant components).
The sharp foreground components will seem to pop, whereas the distant components will recede.
5. Overlap Perspective
Right here’s one other easy perspective approach to create depth in your pictures:
Add overlap.
By positioning objects in order that they overlap with each other, the foreground objects will seem a lot nearer than the background objects.
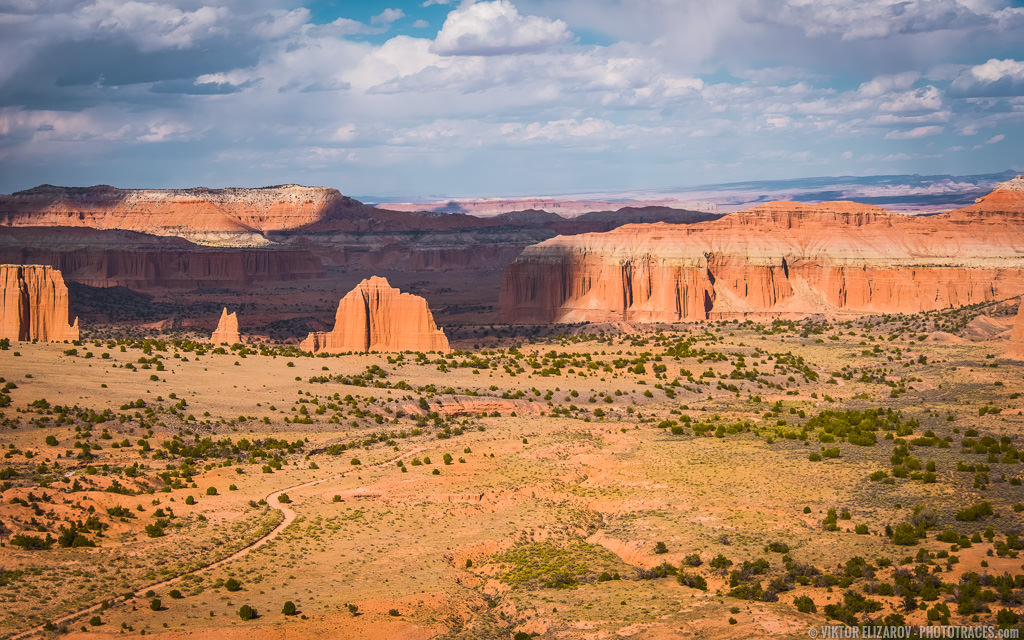
In panorama images, you’ll usually see foreground components, which overlap with middleground components, which overlap with background components. Every overlap serves to create extra depth, and a multi-layered photograph will immediately draw the viewer inward.

So in case you’re struggling to provide depth in a scene you’re photographing, attempt to overlap just a few foreground and background components. It’s a fast solution to enhance the sense of area in a picture (and it usually seems nice!).
6. Fowl’s Eye Perspective (Drone Pictures)
Fowl’s eye perspective comes from taking pictures down on a topic from above.
You’ll usually discover it in drone images or different types of aerial images (e.g., pictures shot from helicopters).
However you possibly can create a fowl’s eye perspective by taking pictures down from excessive vantage factors, reminiscent of mountains or skyscrapers.
A fowl’s eye perspective tends to make objects beneath look very flat–however by getting near your topic from above, you possibly can really do the reverse and improve depth.
7. Diminishing Scale Perspective
You in all probability already learn about diminishing scale perspective–you simply don’t understand it!
You see, diminishing scale perspective merely refers back to the tendency of distant objects to look small and close to objects to look giant.
To see diminishing scale perspective in motion, maintain up one in all your fingers, and evaluate it to one thing far within the background. Your finger ought to be capable to cowl the background object–as a result of it seems a lot bigger than life!
Now, diminishing scale perspective usually comes about naturally in images, as a result of close to objects look bigger than far objects. However in case you get too distant out of your foreground topic, the impact might be diminished.

So if you wish to convey depth by way of a robust diminishing scale perspective, be sure you place your foreground topic near the lens.
Make sense?
Ideas For Utilizing Perspective in Pictures
Now that you simply’re accustomed to the ins and outs of perspective, I’m going to share some simple suggestions for enhancing perspective in your pictures, beginning with:
Tip 1. Use Foreground Parts to Emphasize Depth
Keep in mind how I talked about diminishing scale perspective above?
In case your purpose is to extend depth, you need to use foreground components, mixed together with your information of diminishing scale perspective, to create a really deep picture.
Right here’s the way it works:
First, discover a foreground topic.
Then get near your foreground topic (I like to recommend utilizing a wide-angle lens), and place it prominently in your photograph’s foreground.
Just by together with a robust foreground ingredient, your picture may have enhanced depth. And by ensuring there’s a transparent background ingredient, depth might be enhanced additional!
Tip 2. Add Reference Parts to Stress Scale
One of many best methods to create dramatic, breathtaking panorama pictures…
…is to {photograph} giant topics, however whereas together with reference components to boost the viewer’s sense of scale.
As an example, in case you {photograph} a large archway, you would possibly place an individual down on the base–that manner, the viewer can immediately see how large the arch actually is.
And in case you {photograph} a mountain, you would possibly put a small cottage on the backside, so the viewer can perceive the sheer scale of its peak.

Tip 3. Experiment With Completely different Focal Lengths
Completely different focal lengths lend your pictures various quantities of depth.
So to create fascinating views, why not attempt taking pictures with all completely different focal lengths?
You see, telephoto lenses cut back depth by compressing the scene. All objects are inclined to look extra equally sized.
Whereas wide-angle lenses emphasize depth by making foreground components bigger and background components smaller.

Neither one in all these appears to be like is essentially higher–it relies upon what you’re making an attempt to create. However for beautiful outcomes, I like to recommend you experiment with a number of choices, then decide the composition you want finest!
Tip 4. Experiment With Horizon Placement
Right here’s a perspective approach many photographers neglect:
By positioning the horizon line in numerous components of the scene, you possibly can create or cut back depth.
As an example, in case you place the horizon towards the highest of the body, you’ll usually improve depth (since you’ll give your main traces lots of area to run by way of).

However by positioning the horizon towards the underside of the body, you’ll usually do the alternative, inflicting the viewer to concentrate on the sky and miss the depth conveyed by the foreground components.
Word that you simply don’t should place your horizon randomly throughout the composition. You’ll be able to play with placing your horizon alongside a rule of thirds gridline (or a golden ratio gridline).
That manner, you possibly can improve or cut back depth whereas additionally emphasizing the fascinating components of the scene.
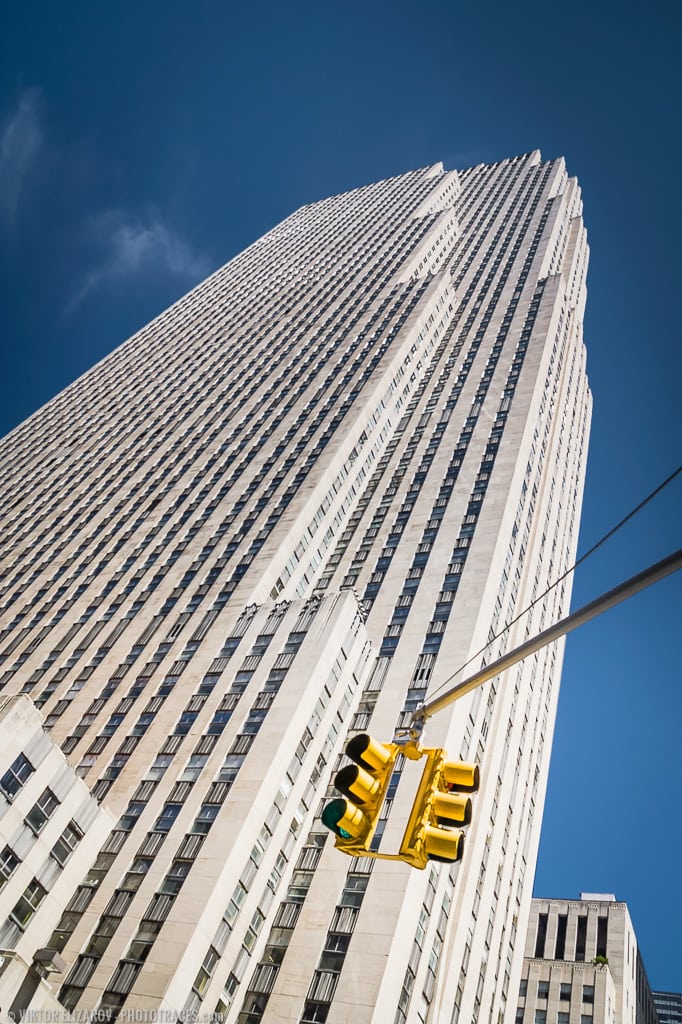
Tip 5. Shoot Trying Up
Most photographers by no means search for. However it is a big mistake!
You see, by taking pictures upward, you’ll find yourself with a novel perspective that the majority viewers may have by no means encountered earlier than.
Plus, taking pictures upward affords a pleasant solution to create depth. You’ll be able to usually discover a vanishing level above you, particularly in case you’re photographing close to tall components.
As an example, in case you {photograph} in a forest, the timber above you’ll usually come collectively at a vanishing level.
And in case you {photograph} amongst tall buildings, the skyscrapers round you’ll usually converge at a vanishing level.
Whilst you received’t all the time discover fascinating pictures by wanting up, it’s a neat little trick that you need to use to immediately improve your portfolio.
Tip 6. Use Excessive Vantage Factors
Within the final tip, I talked concerning the significance of wanting up when out taking pictures.
However it’s also possible to create nice pictures by doing the alternative:
Utilizing a excessive vantage level to shoot down!
What makes this such a fantastic approach?
For one, taking pictures downward will provide you with distinctive pictures that you simply’d by no means seize in any other case. And so they’ll be the kind of pictures that no one has ever taken earlier than as a result of photographers not often suppose to shoot down from up above.
Plus, taking pictures down offers you the choice to flatten your pictures (in case you shoot down from a distance, the objects in your scene will look tiny), or to extend depth (in case you shoot down from shut up, the objects in your scene will recede away, like a number one line).
In the event you like taking pictures from above, you possibly can even think about buying a drone. These will let you seize gorgeous aerial pictures, although you’ll need to be sure you observe the right procedures and rules earlier than flying; you don’t need to break the regulation by mistake.
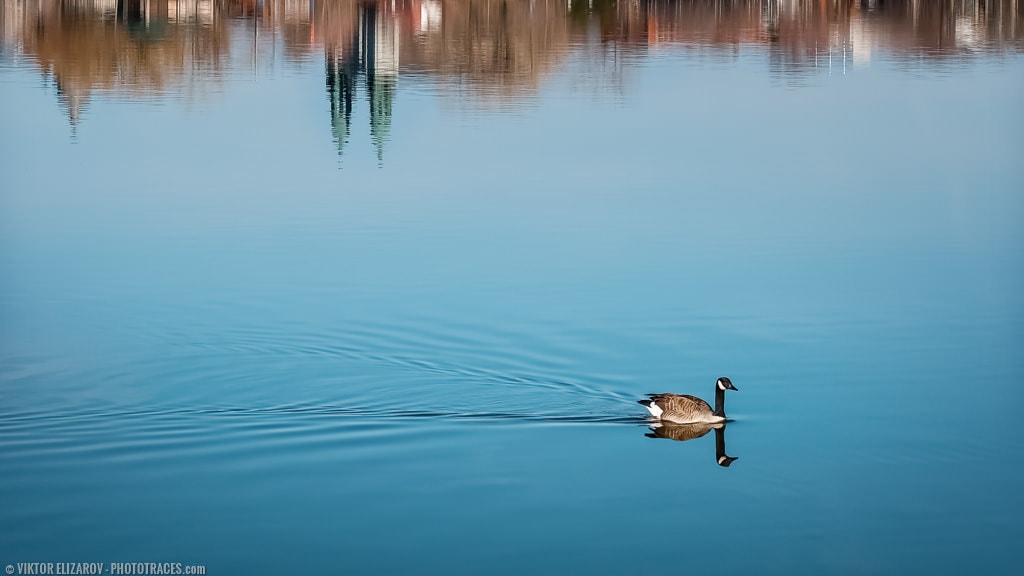
Tip 7. Use Water Reflection Strategically
Right here’s one other fast tip for utilizing perspective in images:
Don’t be afraid to include reflections into your compositions.
The truth is, reflections generally is a good solution to create false perspective, as a result of by together with distant components mirrored in foreground water, you’ll disorient the viewer. As an example, if in case you have a foreground puddle that displays a distant mountain, the puddle and the mountain will appear unusually shut collectively, inflicting prompt confusion.
Whereas lots of confusion will be unhealthy, a little bit of confusion–which quickly resolves itself into understanding–is an effective way to tease the viewer!
Tip 8. Shoot From a Low Angle
Pictures is mostly finished at eye stage.
However in case you’re prepared to interrupt the mould a bit and get down low, you’re usually capable of finding a novel composition–plus, you’ll emphasize foreground components, as mentioned within the part on diminishing scale perspective above!
The truth is, I like to recommend you compose each photograph by testing out just a few unconventional compositions from beneath eye stage. Attempt getting in your knees. Even think about mendacity on the bottom!

It’s an effective way to alter issues up and get actually gorgeous outcomes!
Perspective in Pictures | Conclusion
In the event you’re trying to create highly effective panorama pictures that actually draw within the viewer, then understanding perspective is a should.
And now that you simply’ve completed this text, you understand all about perspective in images–and the way you need to use several types of perspective to boost and cut back depth within the scene.
So go forward and experiment with depth. See what you possibly can provide you with. I wager you’ll love the outcomes!