")
As soon as once more, the motivation behind the “Why are my pictures blurry?” article originated from useful suggestions from my weblog’s readers. In response to a request in my e-newsletter, subscribers overtly shared their major challenges and considerations associated to images.
It turned obvious {that a} majority of my readers encountered a standard impediment – the search for sharpness of their images, a recurring challenge mirrored in inquiries they typically posed:
- “Why Are My Photos Blurry”
- “How can I obtain sharper pictures?”
- “What are the very best sharpshooting methods?”
Why Are My Photos Blurry? – 3 Predominant Causes
I strongly endorse the 20/80 rule, which posits that, in most processes, roughly 80% of the outcomes end result from roughly 20% of the contributing components. When embarking on the journey to grasp any new course of, the target is to determine that pivotal 20% that yields a considerable 80% of the specified outcomes and deal with it as a precedence.
On this dialogue, my focus is on three basic points (20%) answerable for 80% of issues that always hinder the achievement of sharp and clear images.

1. Blurry Photographs Prompted By Incorrect Shutter Pace
Reality. Sluggish shutter pace causes 90% of blurry or tender images taken handheld or and not using a tripod.
The shutter pace controls the period that the time sensor contained in the digicam is uncovered to mild.
For instance, a shutter pace of 1 sec signifies that the shutter stays open for 1 sec exposing the digicam’s sensor to the sunshine. A shutter pace of 1/100 sec signifies that the shutter solely stays open for a fraction (one hundredth) of a second.
The issue happens when the digicam shakes on account of our physique actions (fingers, shoulders, and legs) which ends up in digicam motion when the shutter is open (publicity time).
With a fundamental data of shutter pace, it’s not obscure why it’s a lot simpler to trigger the digicam to shake throughout a 1 sec publicity time compared to a 1/100 sec publicity time.
What’s a secure shutter pace?
It might be nice if I might say that 1/50 sec is the quickest and most secure shutter pace, however that’s not the case. The worth of a secure shutter pace depends upon the focal size and the scale of your digicam sensor. An extended focal size magnifies the digicam shake, which can lead to extra issues for photographers.
For instance, it’s a lot simpler to trigger the digicam to shake at a focal size of 70mm in comparison with 18mm. So how are you going to estimate the most secure shutter pace to satisfy your wants? I take advantage of a easy guideline to estimate a secure shutter pace worth.
After I use a digicam with a cropped sensor (Sony A6000, Fujifilm XT2, Canon Insurgent, Canon 700d, Fuji XT-1), I take advantage of the next method:
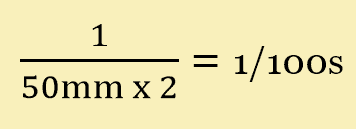
Minimal acceptable shutter pace = 1/focal size x 2
Because of this after I shoot utilizing a 50mm focal size, the minimal shutter pace equals 1/50mm x 2 = 1/100 sec
This doesn’t imply that I can’t shoot at a slower shutter pace (lower than 1/100 sec) as this guideline is just to make me conscious that if I shoot at a slower pace, I’m getting into a doubtlessly harmful space and I’ve to take additional precautions to keep away from digicam shaking or blurry pictures.
2. Blurry Photographs Prompted By Incorrect Incorrect Aperture Settings
As you realized above, the shutter pace controls the period of time the sensor is uncovered to mild. The aperture controls the scale of the opening within the lens via which mild travels to the sensor.
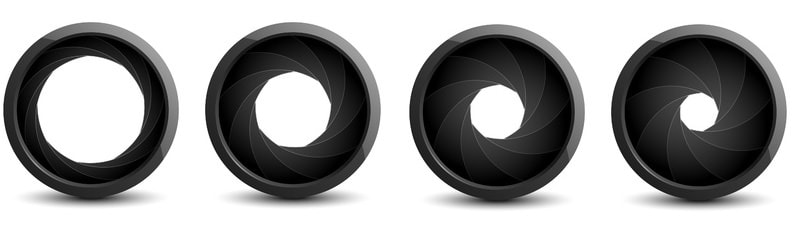
Aperture and Depth of Subject (DoF)
The first operate of the aperture lies in its potential to manage the extent of your scene that is still in focus, a attribute generally known as Depth of Subject (DOF).
As an illustration, when utilizing a broad aperture of f/1.8 on a 50mm focal size, the realm in focus inside your shot turns into fairly restricted. Specializing in a topic two meters away, the Depth of Subject narrows to a mere 11 cm, leading to solely a really small portion of the scene being sharp (shallow depth of subject).

Nonetheless, do you have to go for a small aperture (f/13) and an 18mm focal size, the depth of subject turns into considerably wider. On this situation, specializing in an object two meters away ensures that all the things from 0.7 meters in entrance of you to infinity will probably be in sharp focus.

The problem arises when deciding on the mistaken aperture, a standard mistake, particularly in panorama images. As an illustration, when capturing a wide-open panorama to embody the fantastic thing about all the scene, it’s essential to keep up sharpness all through. Utilizing a 50mm lens with the aperture set to f/1.8, as seen within the earlier instance, would lead to a photograph with some areas in focus and others showing blurry.
Methods to Calculate the Depth of Subject
Calculating depth of subject will be approached via numerous strategies, together with reference charts and helpful images apps.
All through the years, I’ve relied on the DOFMaster web site, the place you’ll be able to entry the On-line Depth of Subject Calculator. I extremely suggest exploring this useful resource and experimenting with the calculator. By inputting your digicam mannequin, completely different focal lengths, and apertures, you’ll be able to observe their affect on the Depth of Subject.
Over time, as you achieve expertise and observe, you’ll grow to be adept at assessing depth of subject with out counting on calculators or aids.
3. Blurry Photographs Prompted By Incorrect Focusing
The problem of focusing occurs whenever you give attention to the mistaken object or a part of the scene.
For instance, if you’d like the principle focal point within the distance—let’s say a monument—to be in focus, as a substitute of specializing in the principle object, you unintentionally set the give attention to a tree a couple of meters away from the place you’re standing. The end result will probably be a superbly sharp and in focus tree within the foreground with a blurry and out of focus monument within the background.
On this situation, even your digicam settings—aperture, shutter pace, and so forth.—had been right however the image was ruined by unhealthy focusing.
Associated: Again Button Focus Approach
However don’t fear! I’ll provide you with two easy ideas that will help you keep away from unhealthy focusing points. Since each digicam producer presents an analogous package lens setup with an 18-55mm focal size and a f/3.5-5.6 aperture vary, most starting photographers begin with this package, which makes it an ideal instance.
Focusing Approach in Panorama Pictures
Necessary. Choose the widest focal size of 18mm and set the aperture between f/8-f/11 to maximise the depth of subject worth. Right here’s the principle tip: Focus one-third of the way in which into the scene to get the utmost depth of subject. This fashion, you’ll get all the things in focus ranging from the foreground to infinity.

(For those who shoot handheld and not using a tripod, be sure to observe the secure method pace from the “What’s a secure shutter pace?” part of this text).
The tactic of focusing one-third of the way in which into the scene is a life hack, whereas efficient in 90% of instances, lacks precision and might generally fall quick in more difficult conditions. For better accuracy, I make use of a focusing method primarily based on the idea of Hyperfocal Distance.
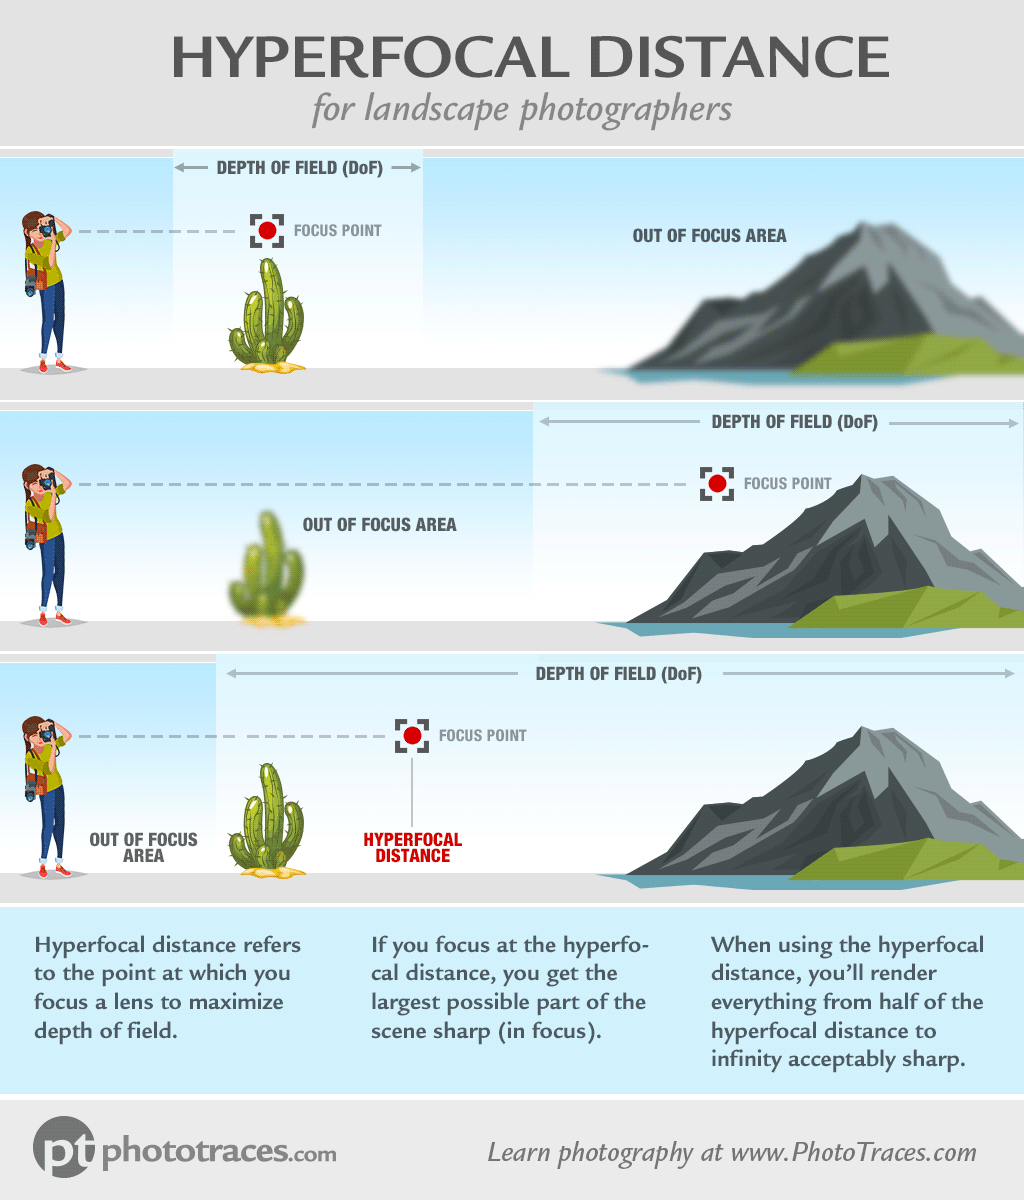
Hyperfocal Distance Approach
Hyperfocal distance is a essential idea primarily based on figuring out the perfect focus level to maximise Depth of Subject (DoF) in your pictures. It represents the gap at which it’s best to focus your lens to make sure that all the things from half that distance to infinity stays acceptably sharp. Primarily, it’s the focal distance that lets you maximize your digicam’s depth of subject, making certain each foreground and background parts are in focus.
If you wish to be taught the Hyperfocal Distance method in-depth, take a look at my devoted tutorial.
By mastering the idea of hyperfocal distance and integrating it into your panorama images workflow, you’ll be able to seize spectacular photographs characterised by wonderful sharpness and depth. This system lets you absolutely showcase the fantastic thing about expansive outside scenes.
Focusing in Portrait Pictures
Choose the longest focal size of 55mm and set the widest aperture of f/5.6. Give attention to the individual’s eyes. For those who shoot from a two to three-meter distance, you’ll create visible separation with a superbly in focus individual and an out of focus background.

As soon as once more, don’t neglect in regards to the secure shutter pace worth we realized earlier.
Tricks to Keep away from Blurry Photographs
Enhance the Handheld Approach to Keep away from Digital camera Shake
Minimizing digicam shake is a basic ability for photographers searching for to seize sharp and clear photographs when utilizing a handheld digicam.
Right here is the checklist of handheld digicam methods and tips I take advantage of in my images.
- I often press my elbows towards my physique whereas holding the digicam as regular as potential.
- I take advantage of the View Finder and press the digicam towards my head to create an additional level of stabilization.
- If potential, I even attempt to discover one thing I can lean towards like a wall, tree, or fence.
- Then, I inhale earlier than taking the shot and maintain my breath to stop unintended shakes.
- I additionally take a number of pictures in order that I can select the sharpest one later.
It’s additionally necessary to know the way regular your fingers are as even this varies from individual to individual and must be adjusted accordingly.
For instance, after taking pictures for a few years, I do know that after I take the precautions listed above that I can shoot at a shutter pace of as much as 1/15 sec at 50mm on a cropped sensor with a hit charge averaging round 50%. This implies out of 10 pictures, 5 will probably be sharp.
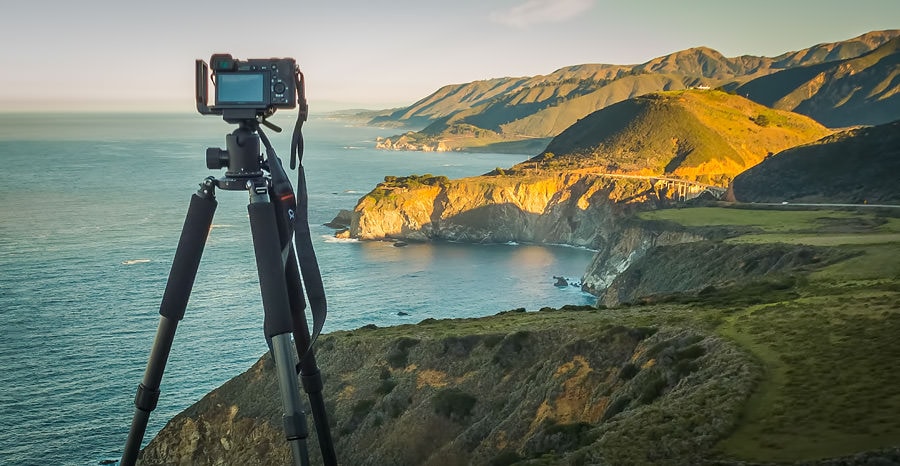
Use a Tripod for Added Stability
Utilizing a tripod is the best solution to keep digicam stability, permitting for using smaller apertures, decrease ISO settings, and longer shutter speeds, leading to higher pictures. Nonetheless, it’s important to put the tripod on a steady floor to keep away from potential shaking from passing site visitors or close by pedestrians.
Investing in a high quality tripod is essential, as low-cost ones might vibrate as a result of digicam’s weight.
Moreover, it’s necessary to flip off picture stabilization when utilizing a tripod, because it’s pointless within the absence of digicam motion. Failure to disable picture stabilization whereas utilizing a tripod could possibly be a contributing issue to blurry pictures.
Use the Time Delay Operate
Once you’re utilizing a tripod to seize pictures, you may assume that digicam shake is not a priority, however that’s not solely correct. Even the act of urgent the shutter button can introduce vibrations that have an effect on the sharpness of your pictures. That is the place your digicam’s time delay operate comes into play.
Utilizing the time delay operate is a straightforward but extremely efficient method to make sure your photographs are sharp and free from the consequences of digicam shake. This methodology is especially useful in conditions the place you’re capturing long-exposure pictures, close-up macro photographs, or every time the utmost precision is required.

By integrating this function into your images workflow, you’ll be able to improve the general high quality of your tripod-mounted pictures.
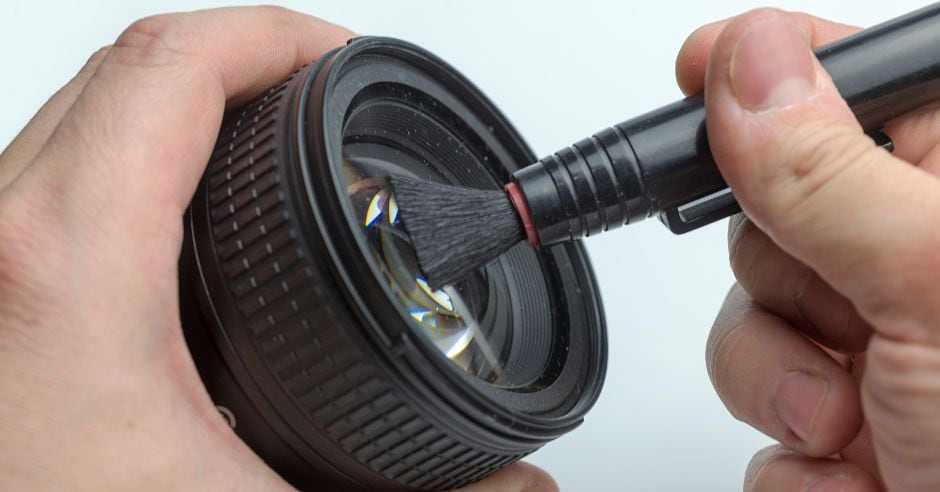
Bonus Tip – Maintain Your Lens Clear
Be sure that your lens is clear. Whereas it sounds apparent (and I promise I’m not making an attempt to insult your intelligence), you’ll be stunned by what number of pictures I ruined as a result of I forgot to wash the lens. Through the years, I’ve developed the behavior of glancing over the entrance of my lens each time I get able to take a shot and clear entrance component of lens if vital. To make it much more handy, I preserve cleansing tissues in all places from my bag and pockets to my automobile.
How To Repair Blurry Photographs
The simplest solution to deal with blurry photographs is to stop them within the first place. Nonetheless, if you end up with photographs that lack the specified degree of sharpness, there are methods to rectify the scenario in put up manufacturing.
Traditionally, rectifying blurry photographs via post-processing has introduced a substantial problem. Only a few years in the past, it was practically unattainable to totally restore misplaced sharpness. The introduction of AI-powered sharpening software program has led to some enchancment on this realm. These AI instruments can improve picture sharpness to a sure extent, though it’s important to remember that they can’t carry out miracles.
One notably efficient sharpening software program resolution is Topaz Sharpen AI (Photoshop plugin). This instrument is particularly designed to deal with points with “tender” photographs and barely “out-of-focus” images, making it a useful useful resource for photographers searching for to salvage blurry pictures.
Whereas AI-based sharpening can’t substitute for some great benefits of capturing sharp photographs in-camera, it may function a useful instrument for these cases when you find yourself with less-than-ideal outcomes.
FAQ: Why Are My Photographs Blurry?
Ought to I Use the Guide Focus Approach?
Guide focus is usually a useful method when precision is essential, particularly in eventualities the place autofocus might wrestle, equivalent to low-light situations or scenes with low distinction.
Nonetheless, my method of utilizing autofocus after which using the autofocus lock (AFL) button gives a sensible different. By using this methodology, I profit from the preliminary pace and comfort of autofocus, adopted by the flexibility to lock the main target and take a photograph.
Finally, the selection between handbook focus and autofocus, or a mix of each as I’ve described, depends upon your taking pictures model, the particular necessities of your topic, and the situations wherein you might be photographing.
Does Sooner Shutter Pace Trigger Blurry Photos?
No, sooner shutter pace doesn’t trigger blurry photos; in actual fact, it would assist stop blurriness and make sure the photographs will probably be sharp. Once you use a sooner shutter pace, the publicity time is shorter, minimizing the probabilities of capturing movement blur. That is notably helpful when photographing a transferring topic or in conditions the place digicam shake can result in blurry photographs.
To keep away from getting blurry photos, particularly when coping with dynamic or fast-paced scenes, think about using a sooner shutter pace.
What Shutter Pace Ought to I Use When Capturing Transferring Topic?
When photographing transferring topics, deciding on the suitable shutter pace is essential to make sure your photographs are sharp and free from undesirable movement blur. The superb shutter pace depends upon the pace of the topic and the impact you wish to obtain.
For fast-moving topics like sports activities or wildlife, a sooner shutter pace (e.g., 1/500 seconds or larger) is advisable to freeze the motion and keep away from blurred pictures. Then again, the use a slower shutter pace (e.g., 1/60 seconds) can be utilized to convey a way of movement, making a dynamic and intentional blur.
For a extra in-depth understanding and to find out the very best shutter pace for numerous eventualities, seek advice from the “Shutter Pace Chart” tutorial with a devoted infographic.
Does Zoom Degree Have an effect on the Sharpness of the Photographs?
Sure, altering the focal size in your zoom lens can certainly affect the sharpness of your pictures. Once you zoom in, growing the focal size, there’s a better potential for digicam shake, and the danger of capturing tender or blurry pictures might improve. To compensate for this, it’s important to make use of a sooner shutter pace or make use of stabilization strategies, equivalent to utilizing a tripod.
For instance, when utilizing a 70-200mm lens it’s virtually unattainable to keep away from blurry pictures at 200mm however 70mm is a comparatively secure focal size for getting sharp photographs.
Subsequently, being conscious of your shutter pace and stabilization methods is essential to keep away from the widespread downside of a “picture is blurry.”
Ought to I Use the Mirror Lock As much as Maximize the Sharpness of My Photographs?
When contemplating whether or not to make use of the Mirror Lock As much as maximize the sharpness of your pictures, it’s necessary to acknowledge that most photographers right now make the most of mirrorless cameras, eliminating the necessity for a mirror. Mirrors are unique to DSLR cameras.
Within the realm of DSLR images, using the mirror lock-up is usually pointless when capturing landscapes. For those who’re utilizing a tripod for stability and making the most of a “time delay operate” to mitigate digicam shake, these measures alone are sometimes ample to attain sharp pictures.
Nonetheless, there are particular eventualities, equivalent to macro images, the place using the mirror lock-up turns into extra related. So, whereas it might not be universally required, there are conditions the place selecting to “lock up your mirror” can certainly contribute to maximizing the sharpness of your pictures.
Why Are My Photos Blurry? | Conclusion
For those who perceive and be taught a couple of easy guidelines about the best way to assess a secure shutter pace, estimate the depth of subject, and know the place to focus, you’ll be producing sharp photographs time after time! With this data, you received’t end up questioning, “Why are my pictures blurry?” once more.